Lesson 4-3
How do I Branch on a Repository?
Like I said earlier, we need to do 3 things in order to Branch.
- Create a Branch to work out of (you can also do this on GitHub.com)
- Add code to that branch
- Commit/Push the Branch
For these instructions, I will show you how to do all 3 steps in each sub-section.
GitHub Desktop
Creating a Branch
- Open GitHub Desktop and open the repository that you want to branch in.
- On the top ribbon under "Current Branch", click the button in that area.
- Click "New Branch".(see Figure 4A)
- Enter a name for your new Branch and then click "Create Branch".(see Figure 4B)
- On the main screen, click "Publish Branch". This will push the new branch to your repository on GitHub.com.(see Figure 4C)
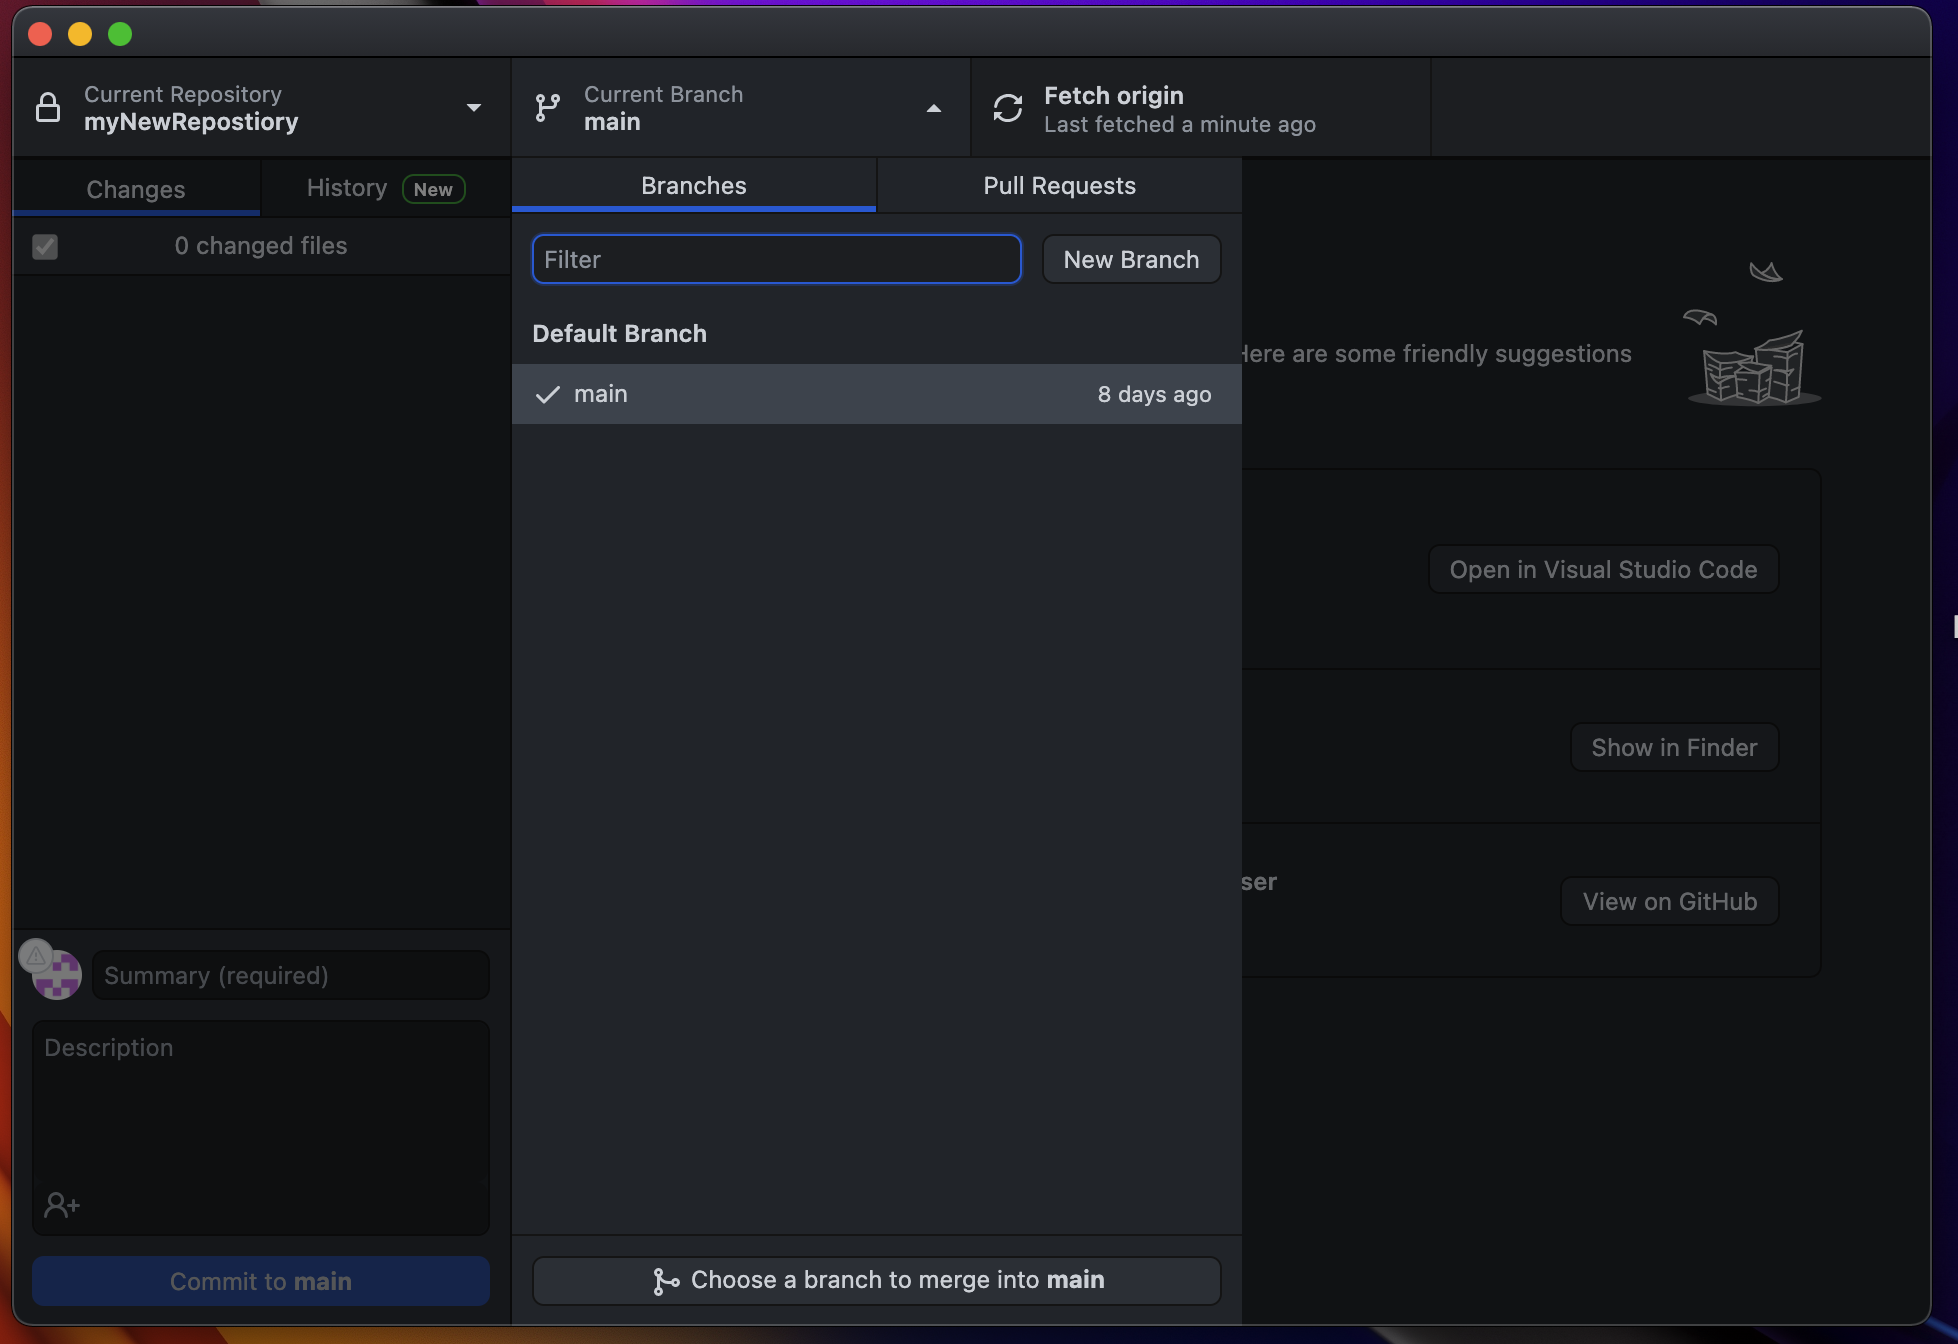 Figure 4A: This window shows all of the Branches you have, as well as it gives you the option to make a new one, and filter the ones you already have.
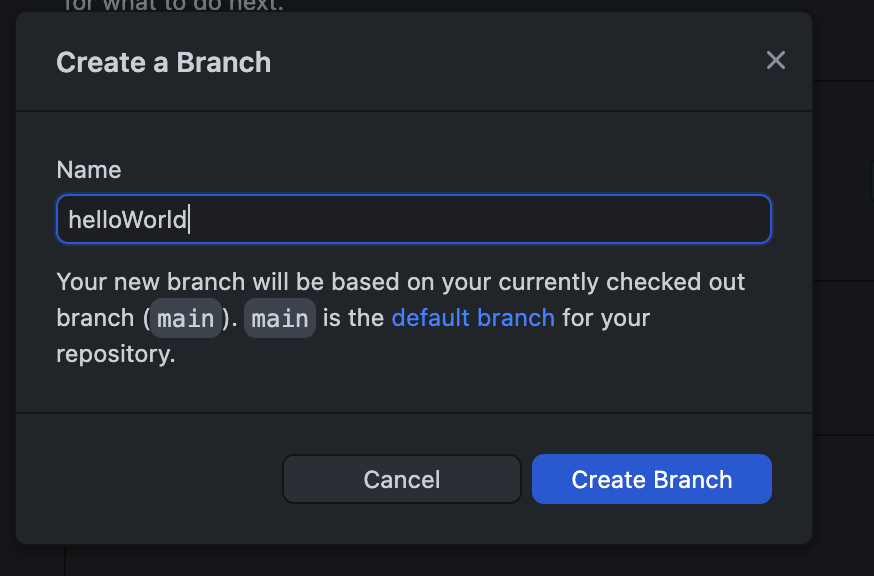 Figure 4B: This is what the new branch window will look like.
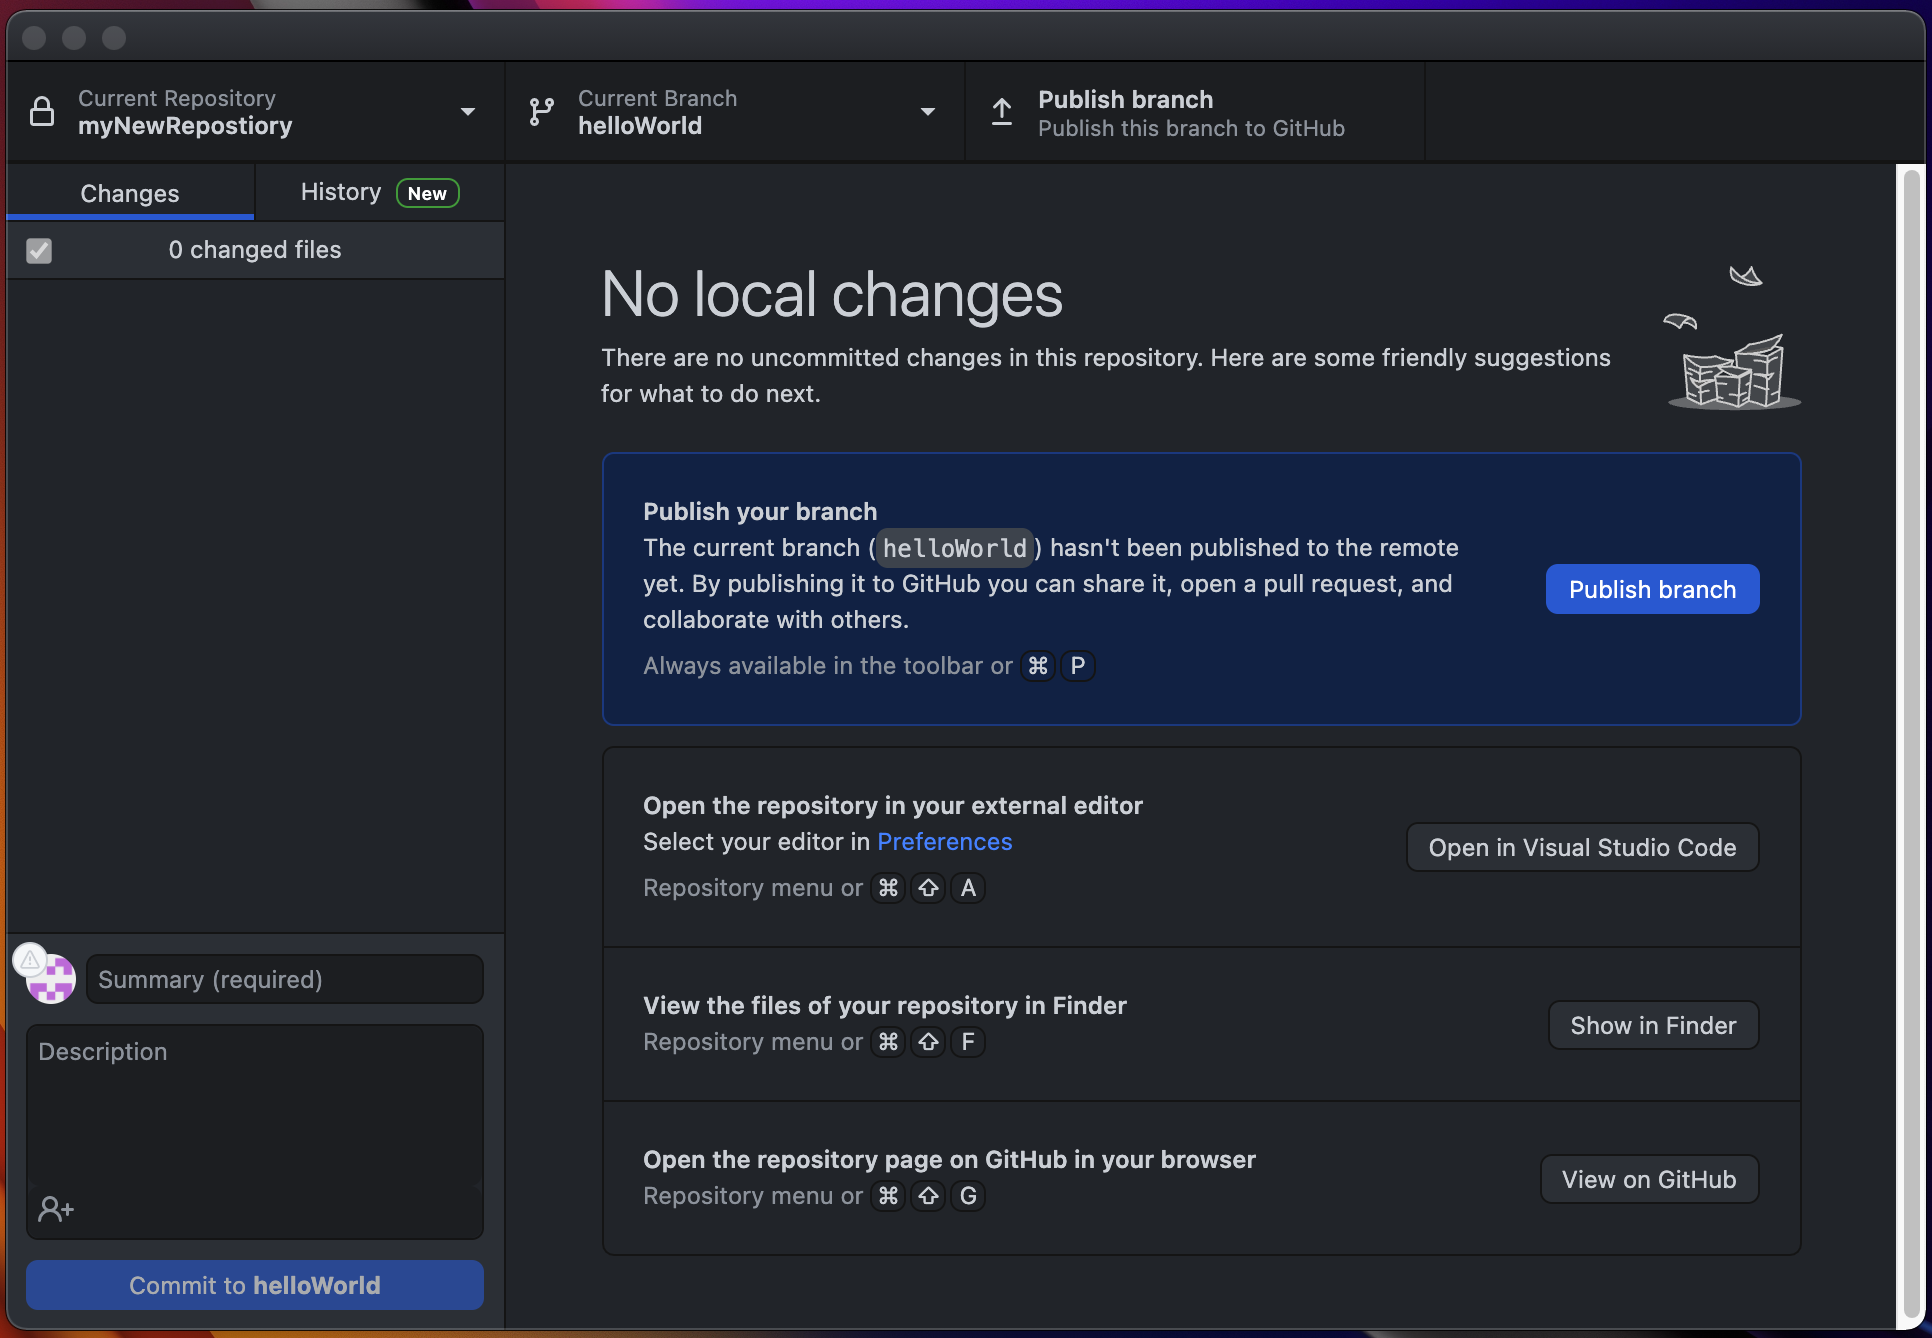 Figure 4C: This is what you shall see once you have created a branch.
To switch between branches, follow step 2, but instead, select the branch you want to work out of.
This process is called git checkout and works similar to checking out a book from a library. You are taking all of the files from a specified branch and working inside of them at a different location in your repository, like how you take a book home from the library to read and then eventually return.
Note that it will say for you to do a pull request after the last step, but that is optional. It allows you to compare two branches (the one you created and an already existing one).You can, as will I, ignore this.
Now go ahead and do any coding you want. In my case, I added a file called hello.py that prints "helloWorld" in the console.
Committing/Pushing with a Branch
There really isn't much to say here. Just like you would commit/push on the main branch from 3-3, you would follow the same steps but instead you are committing to your new branch.
After committing/pushing this is how the main branch looks:
 Figure 4D: Notice that "hello.py" isn't to be found here.
...and this is how our helloWorld branch looks:
 Figure 4E: Notice that "hello.py" is here. That is the magic of branching (not Macy's).
Now that we have added some code, let's merge our branch back into main. You would normally do this once you are ready to merge new changes from the front-facing part of your app with the new backend code.
Merging 2 Branches
- Open the branch you want to merge into in repository. (In most cases, you want to merge a separate branch into your main branch.)
- On the top ribbon under "Current Branch", click the button in that area.
- You should see all of your branches, including the main one. Click "Choose a branch to merge into main".(see Figure 4F)
- On the Pop up window, select the branch you want to merge and click "Merge \branchName\ into main".(see Figure 4G)
- Push your new changes.
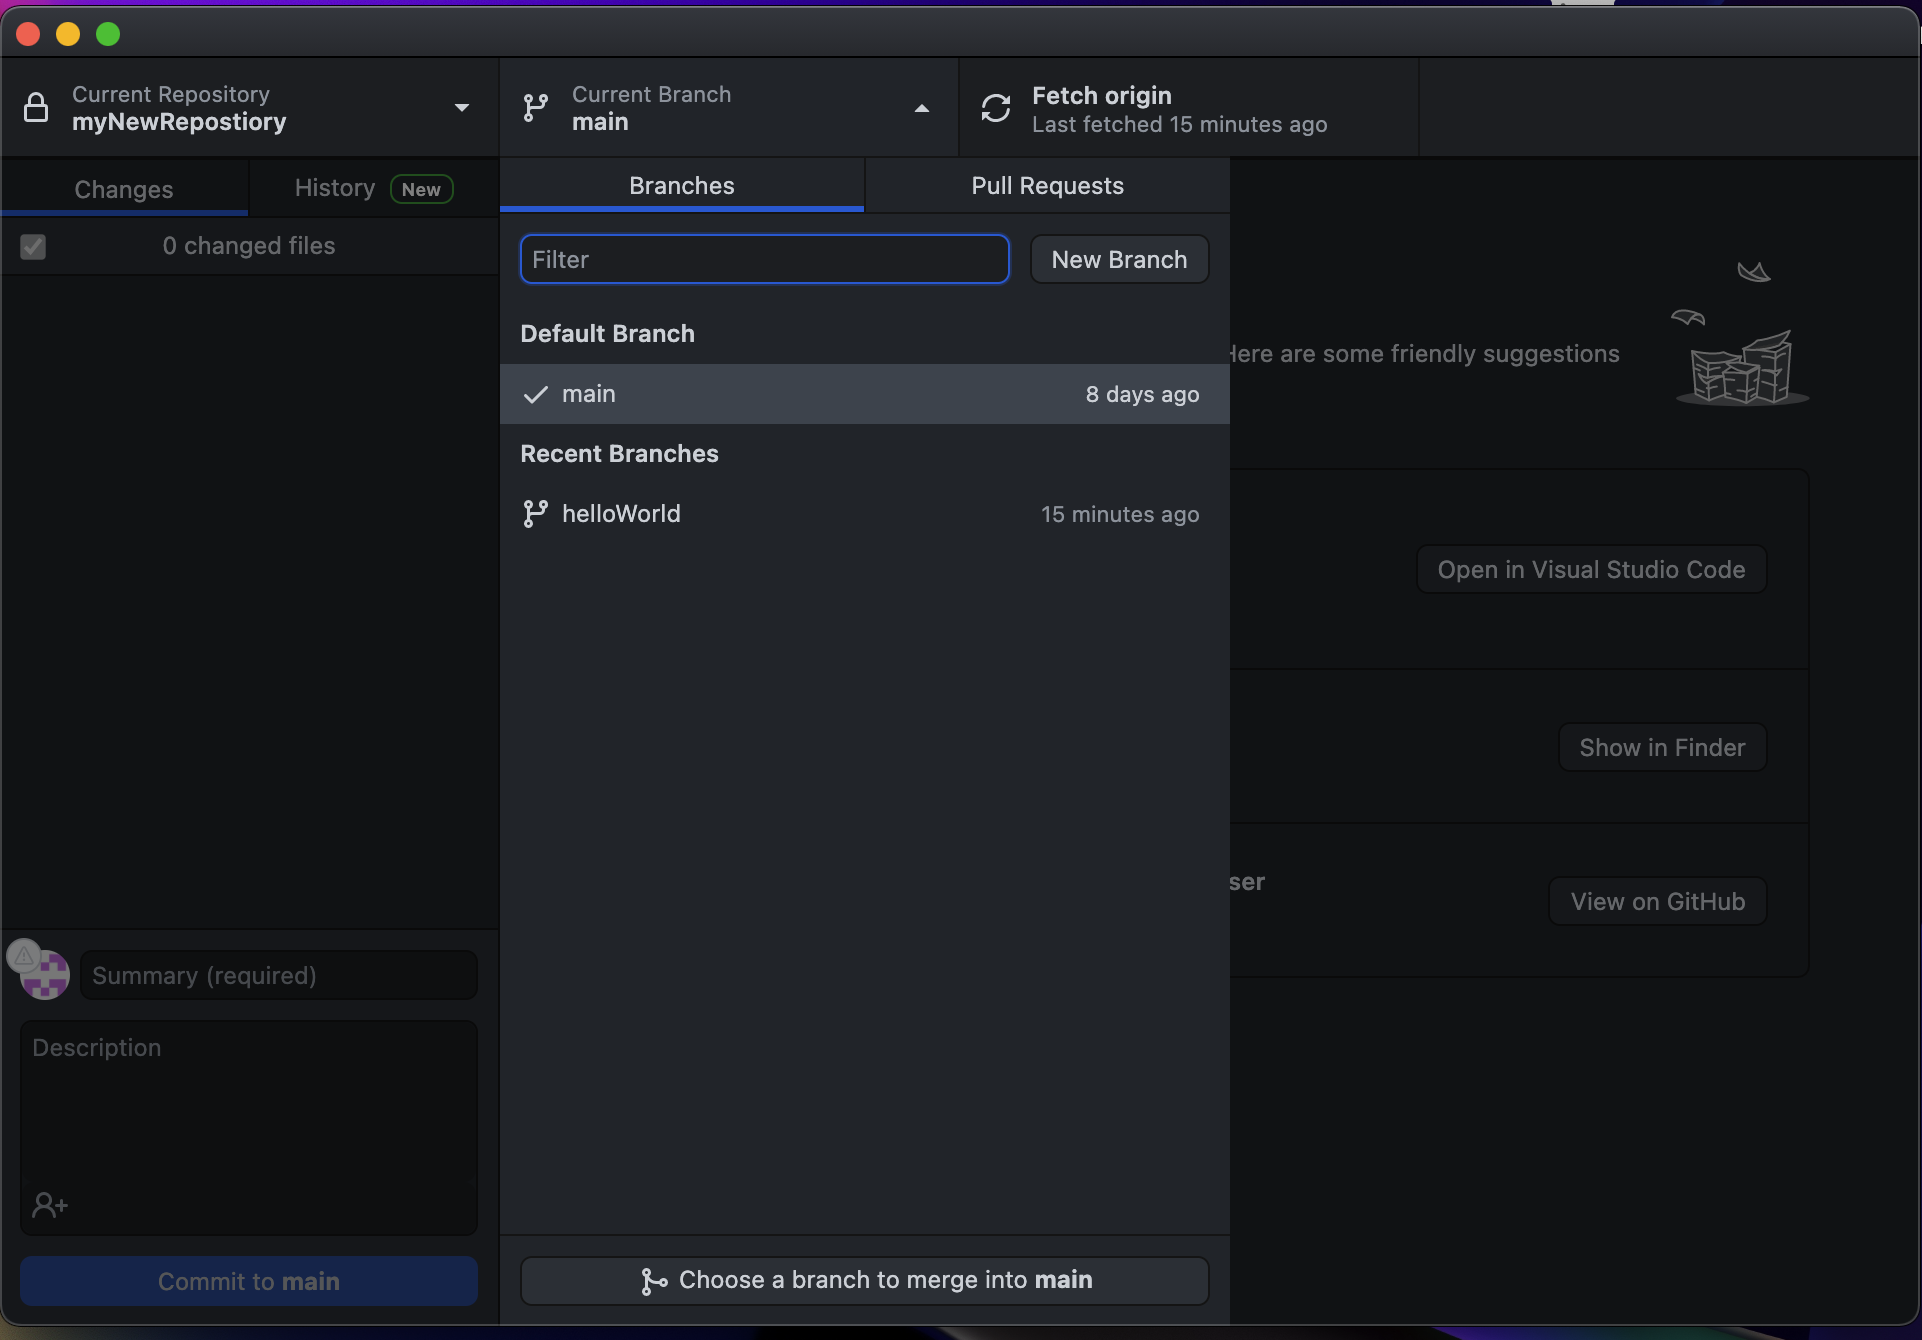 Figure 4F: You will be presented with all of the branches in the repository.
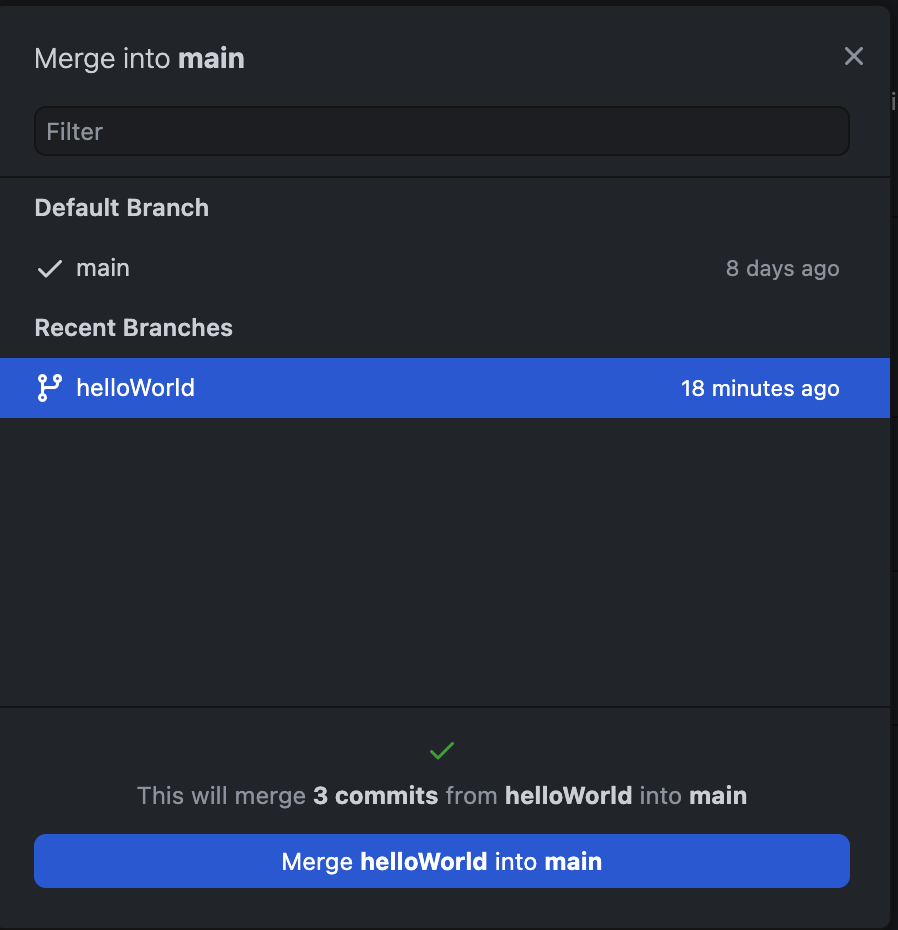 Figure 4G: Select the branch to merge and click the button at the bottom.
That is all that there is to doing branching on GitHub Desktop. Now let's explorer how to do it in Terminal.
Terminal
Creating a Branch
- Navigate to the directory with your repository via the cd command.
- To create a new branch, type in git branch \branchName\ and hit enter.(see Figure 4H)
- Just like in terminal, you can make a directory (mkdir) but it doesn't put you inside of it. In order to make changes in the newly created branch (or even to switch between branches) type git checkout \branchName\ and then click enter.(see Figure 4I)
- Once you are done with adding at least 1 file, type in git push -u origin \branchName\ and click enter.(see Figure 4J)
- The previous step only pushed the new branch. Go ahead and commit/push new changes as outlined in section 3-3.
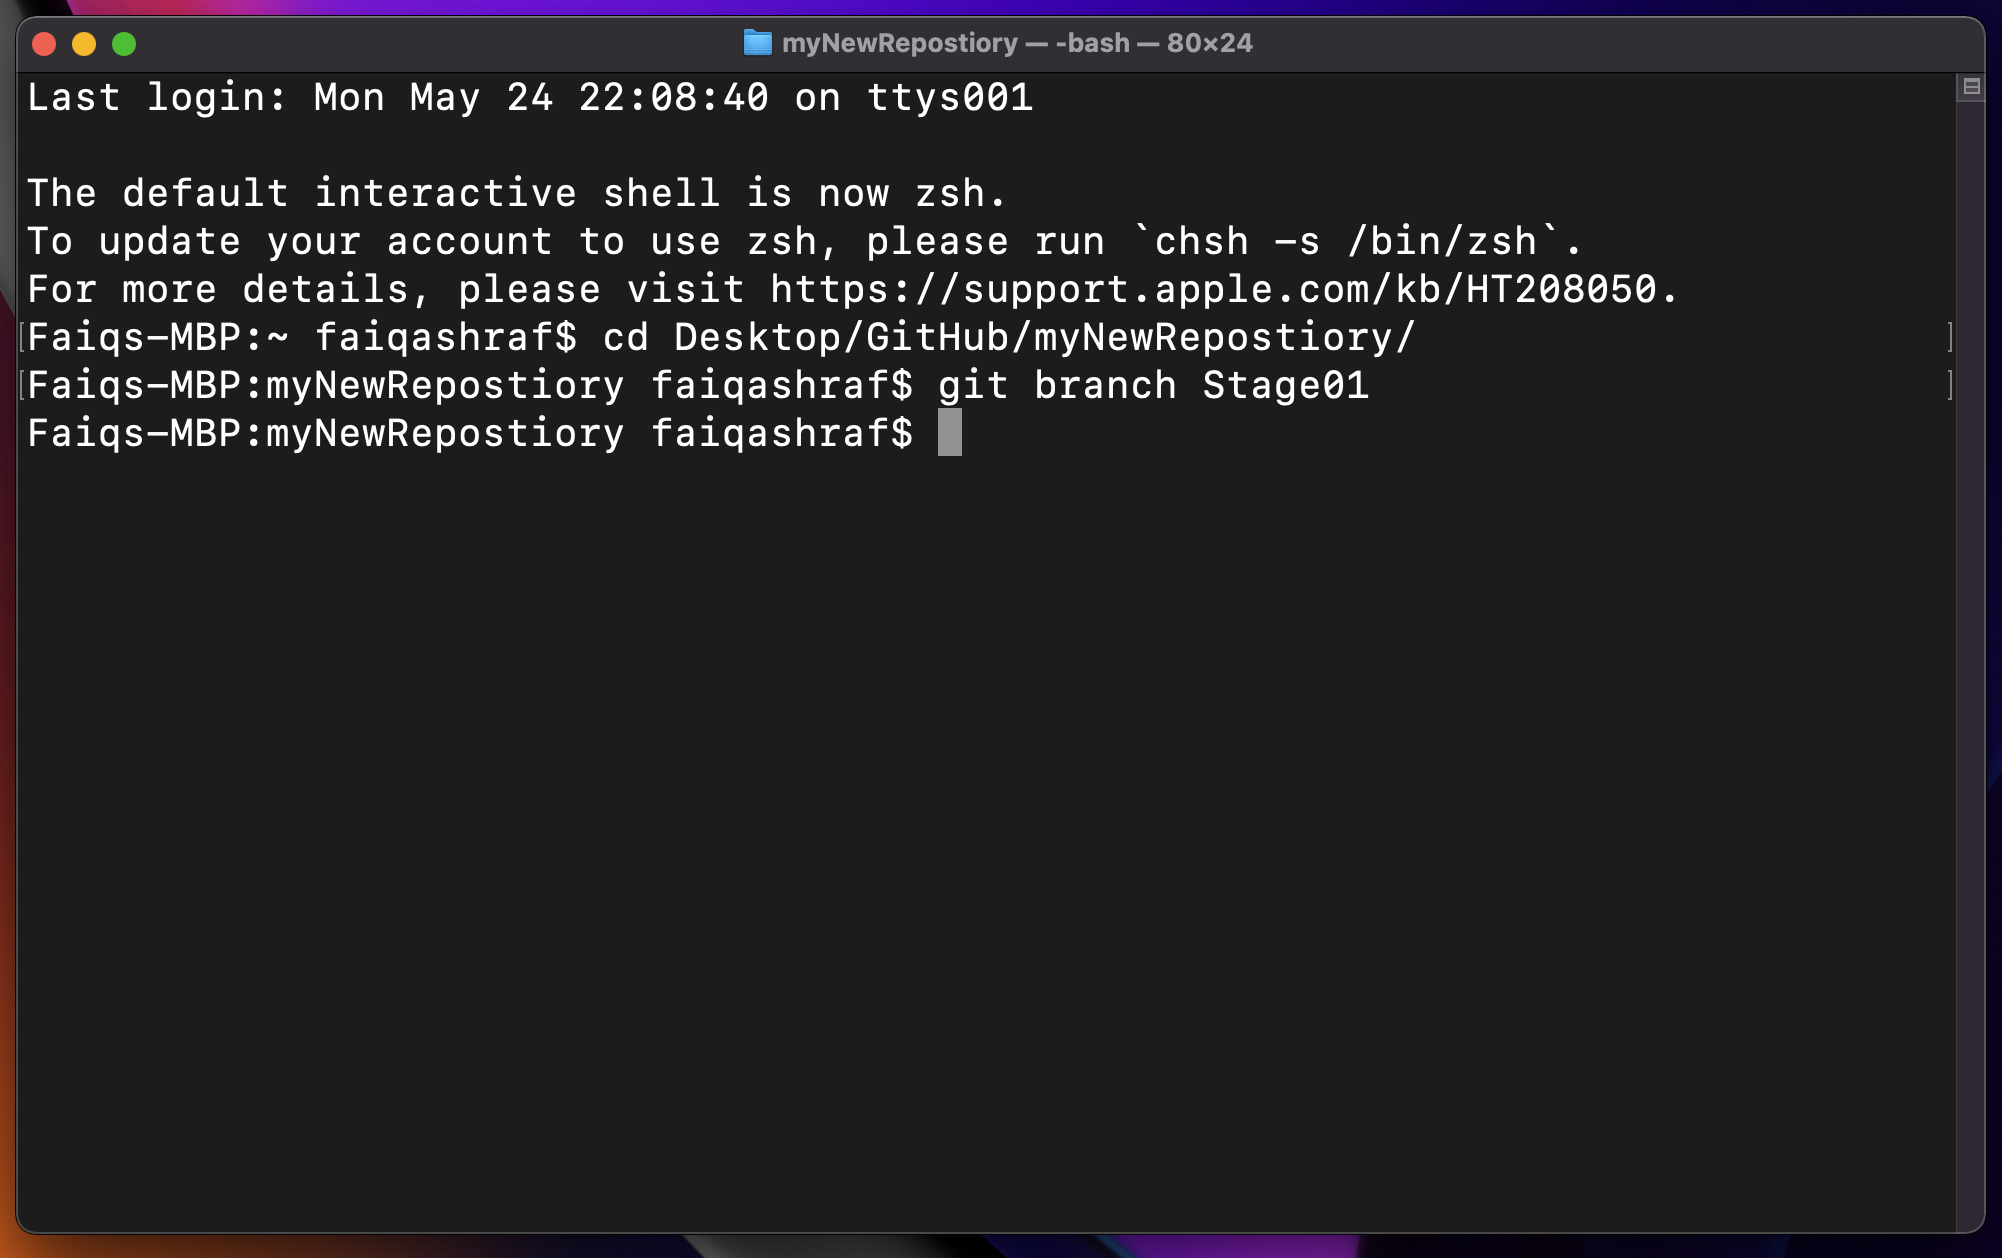 Figure 4H: This is what you will see after you click enter. Nothing will pop up, but that is normal.
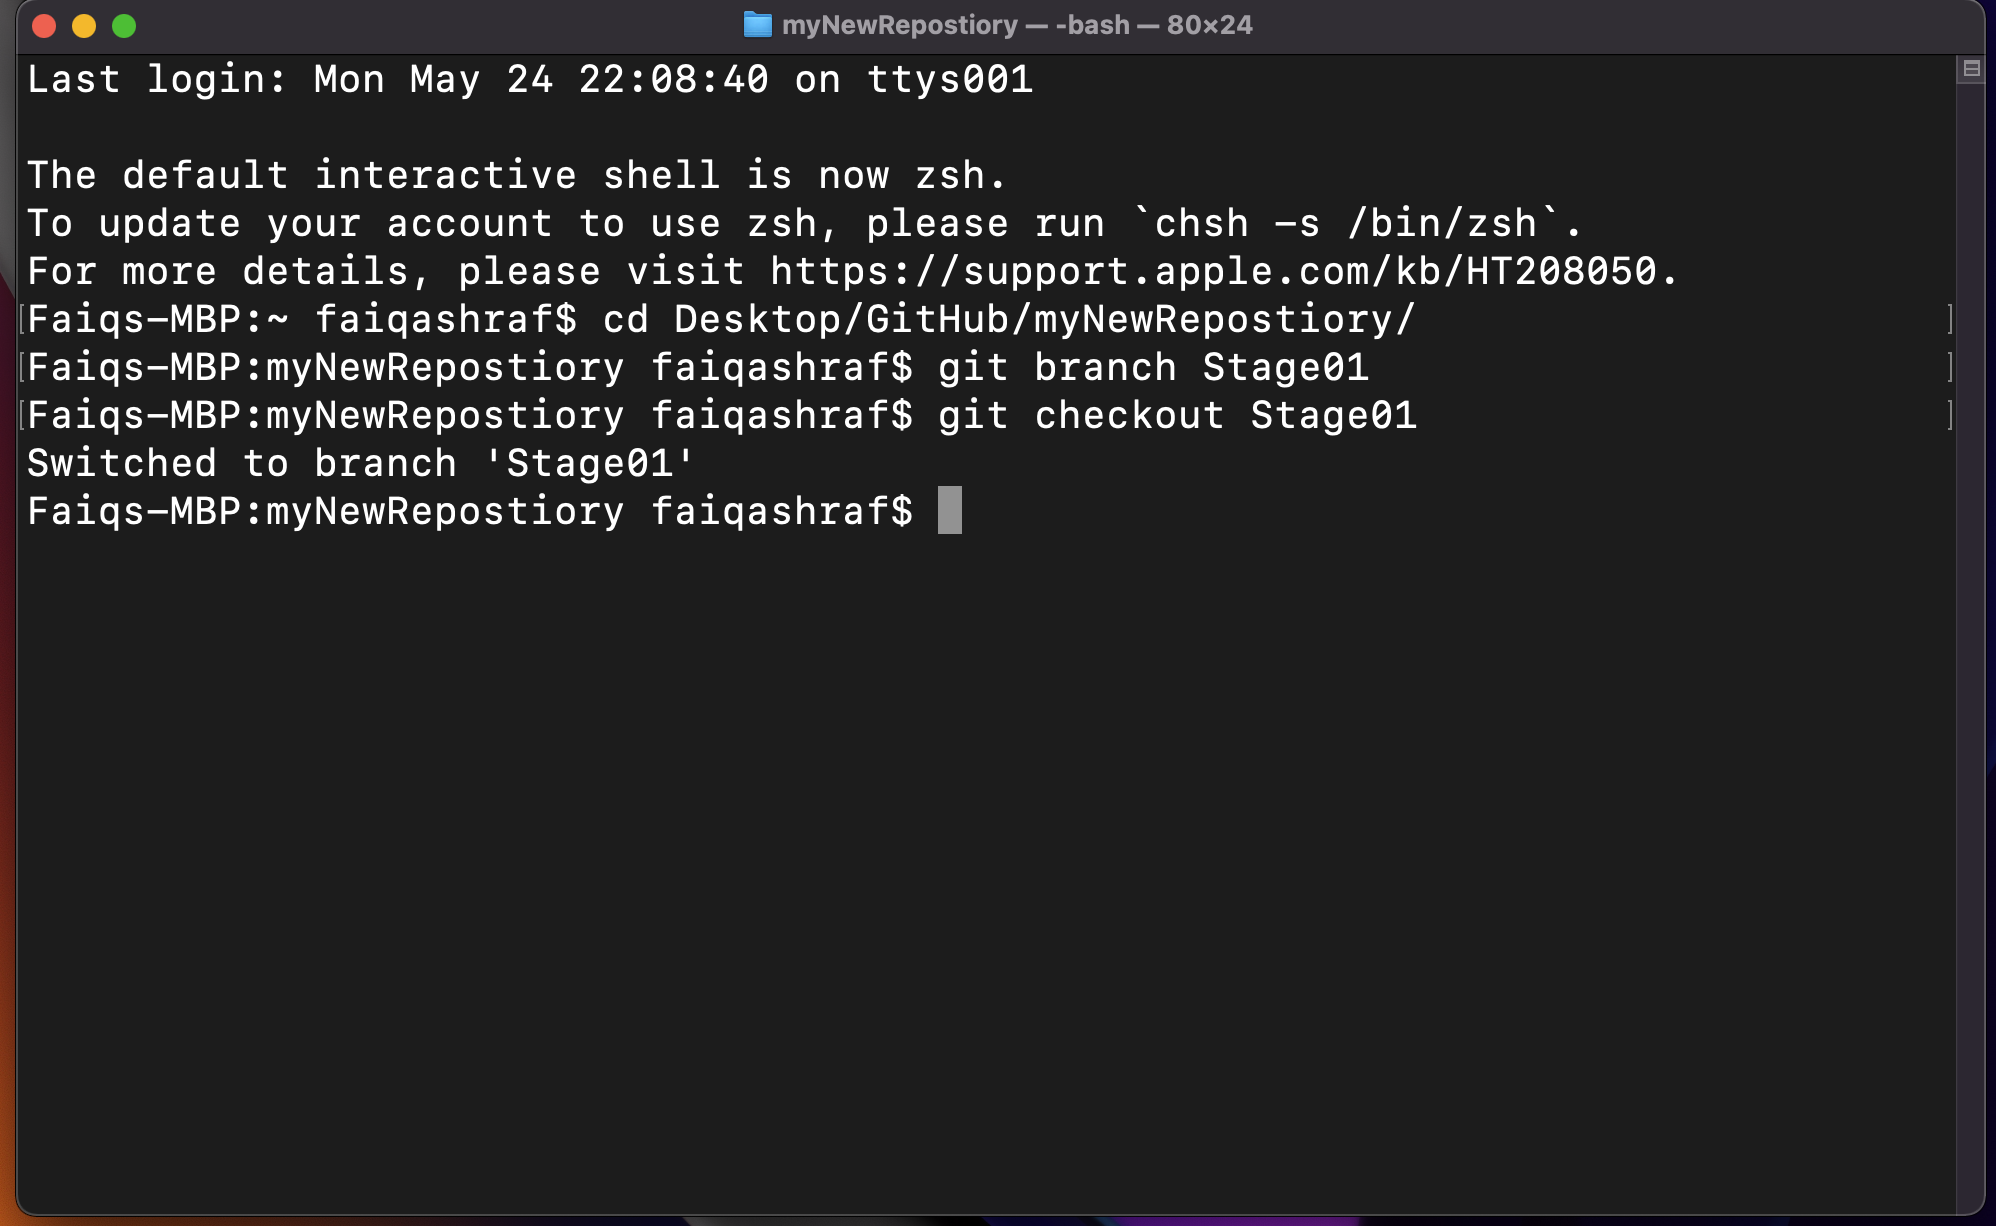 Figure 4I: Simple command to switch to new terminal. Read the output to make sure you're in the right branch!
Now go ahead and add some code to this branch. Once that is done, you can go ahead and push it to GitHub.
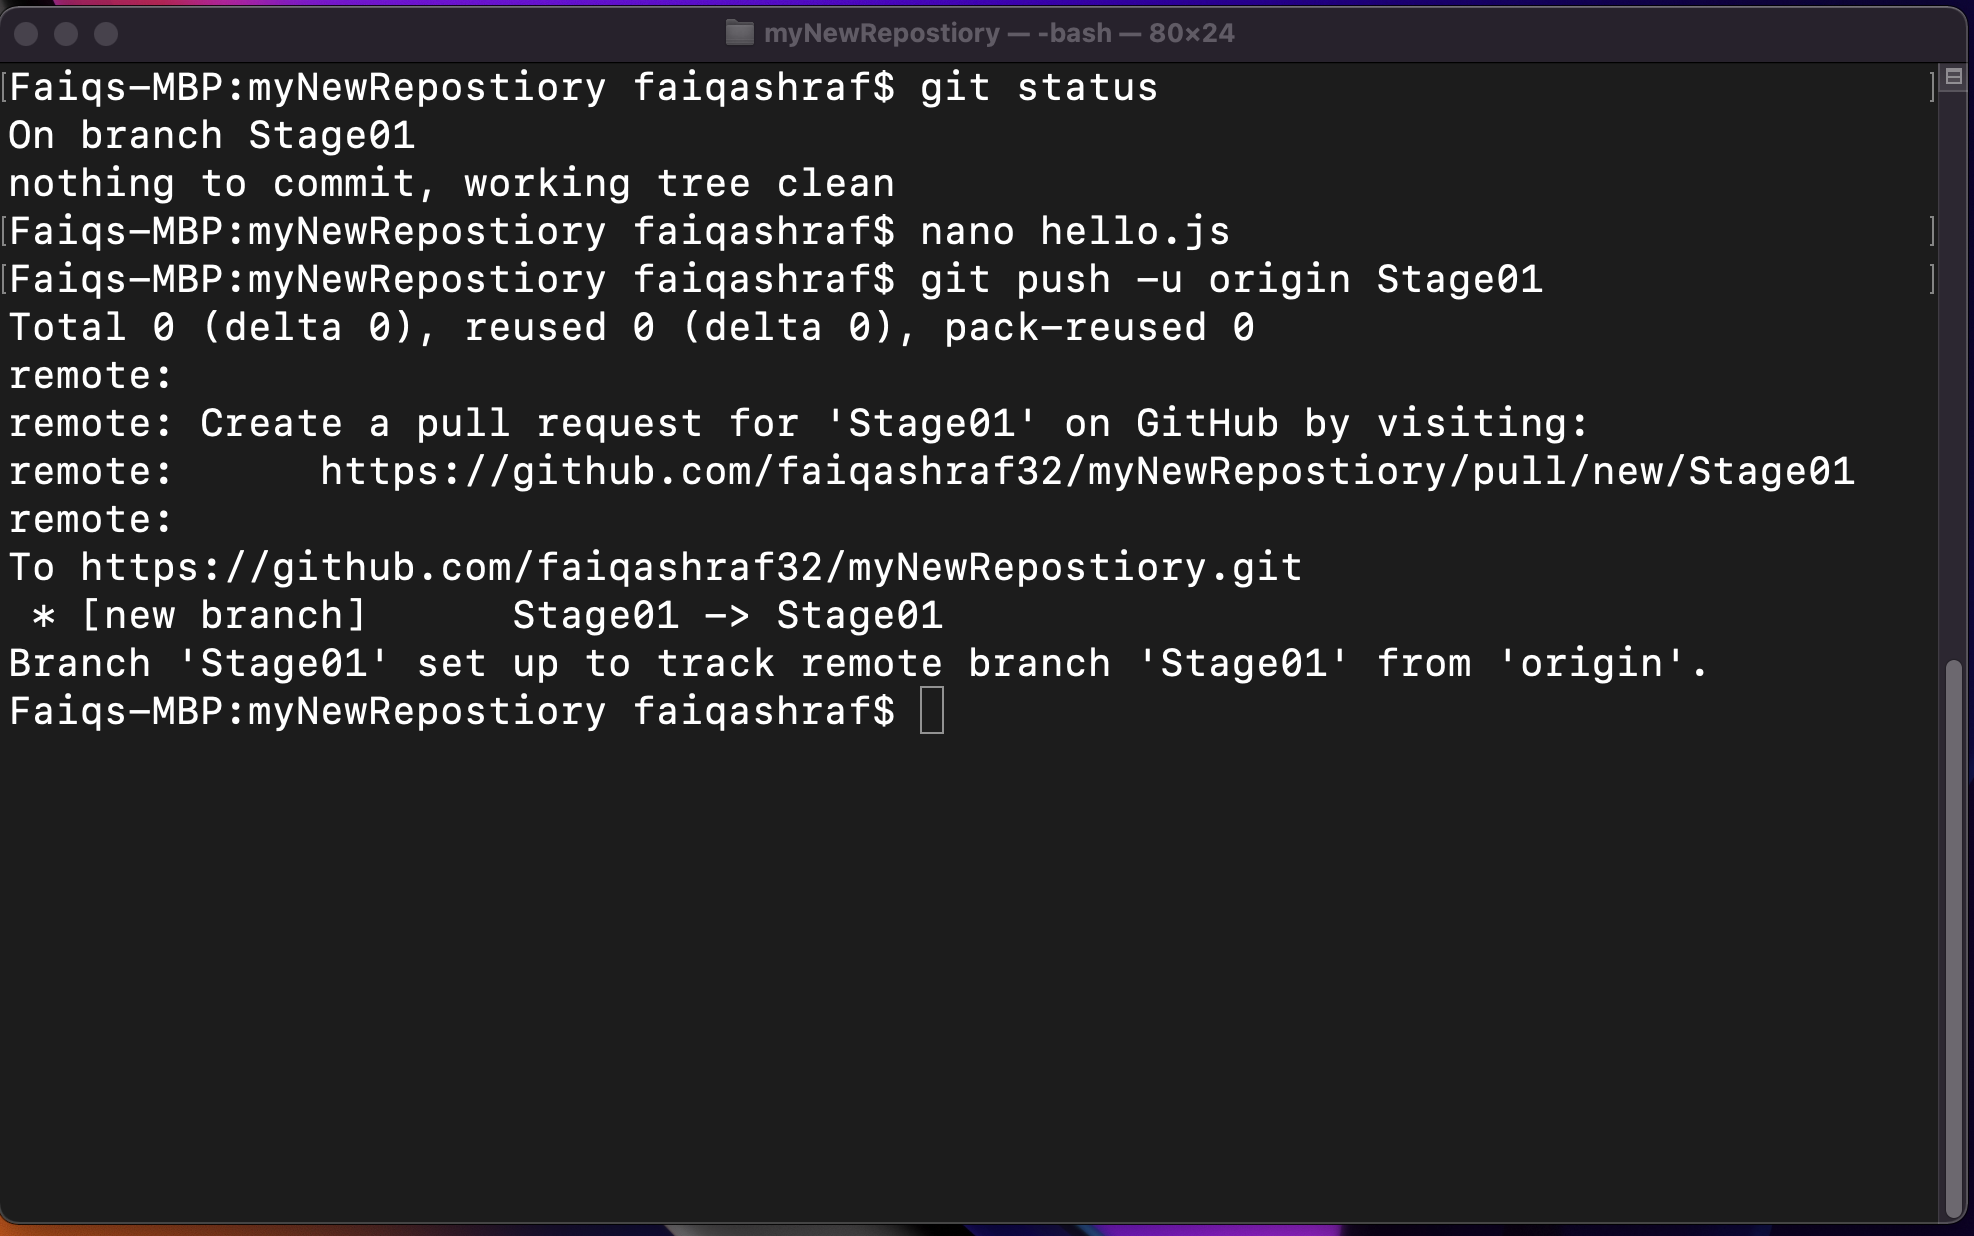 Figure 4J: Pushing the branch is similar to doing so normally.
Similar to before, you might need to switch between branches. You can do so by typing git checkout \branchName\
If you want to see what branch you are in currently, type in git branch. The one with the * next to it will indicate where you are. This command will also list all branches in the repository.
Again, notice how main does not have our hello.js, but Stage01 does:
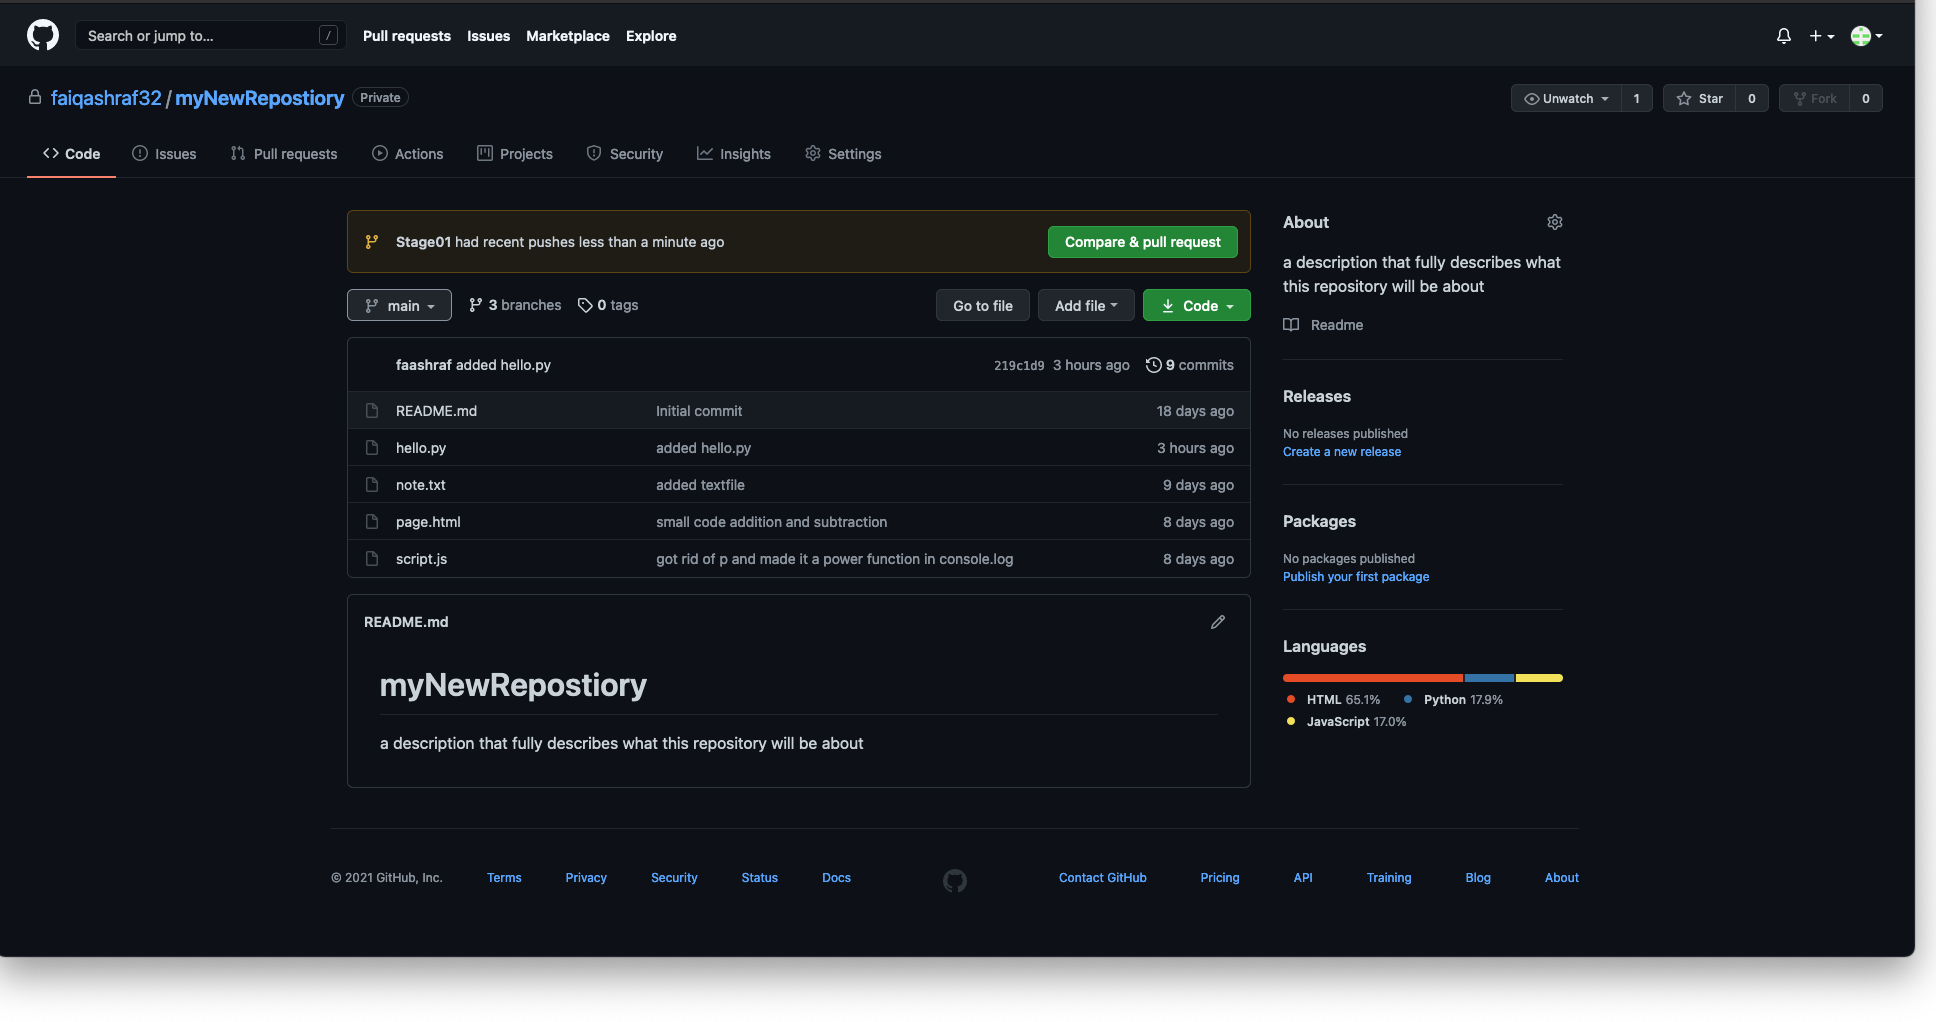 Figure 4K: hello.js is nowhere to be found in main.
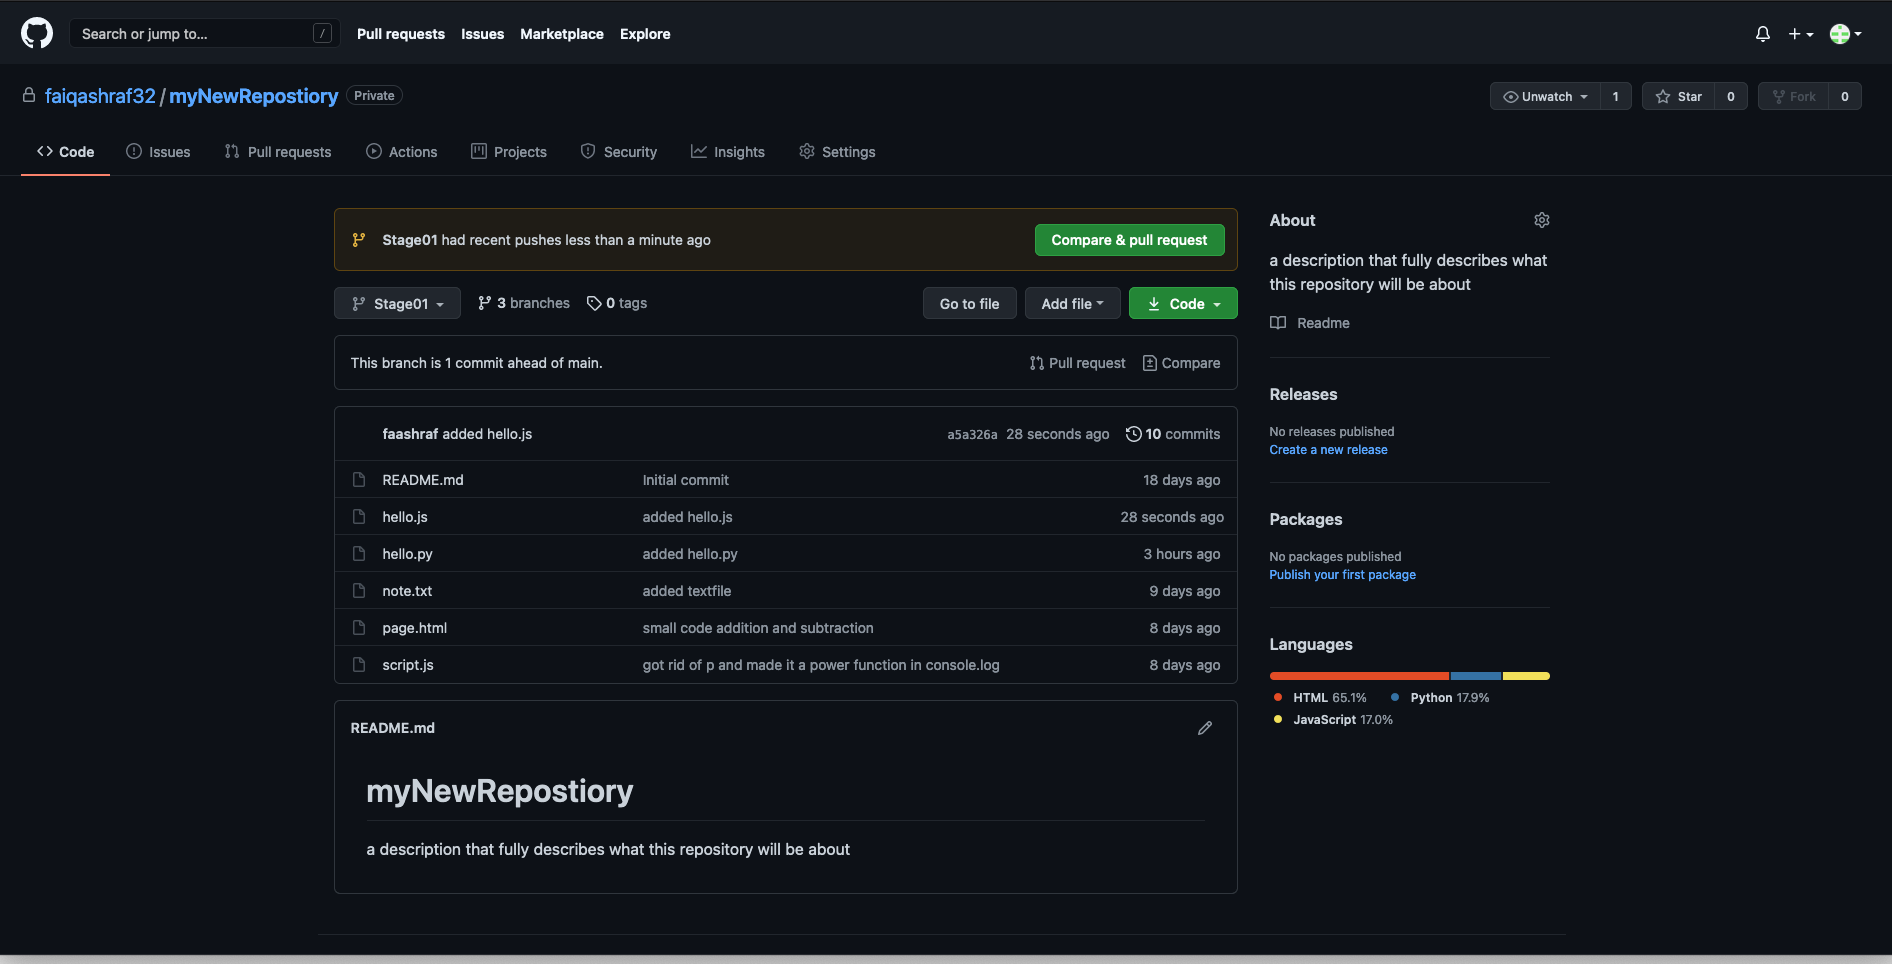 Figure 4L: hello.js is alive and well in our branch named 'Stage01'.
We are now ready to merge back into main. Here is how we do just that.
Merging 2 Branches
- Move to the branch you want to merge into by typing git checkout \branchName\ and clicking enter.(see Figure 4M)
- Now, to merge the two branches, type git merge \branchThatYouWantToMergeWithMain\.(see Figure 4N)
- Make sure everything transferred over by typing ls into terminal. Use nano \file.extension\ view the contents of a file as a testing point.
- Push changes to GitHub like normal.(git push)
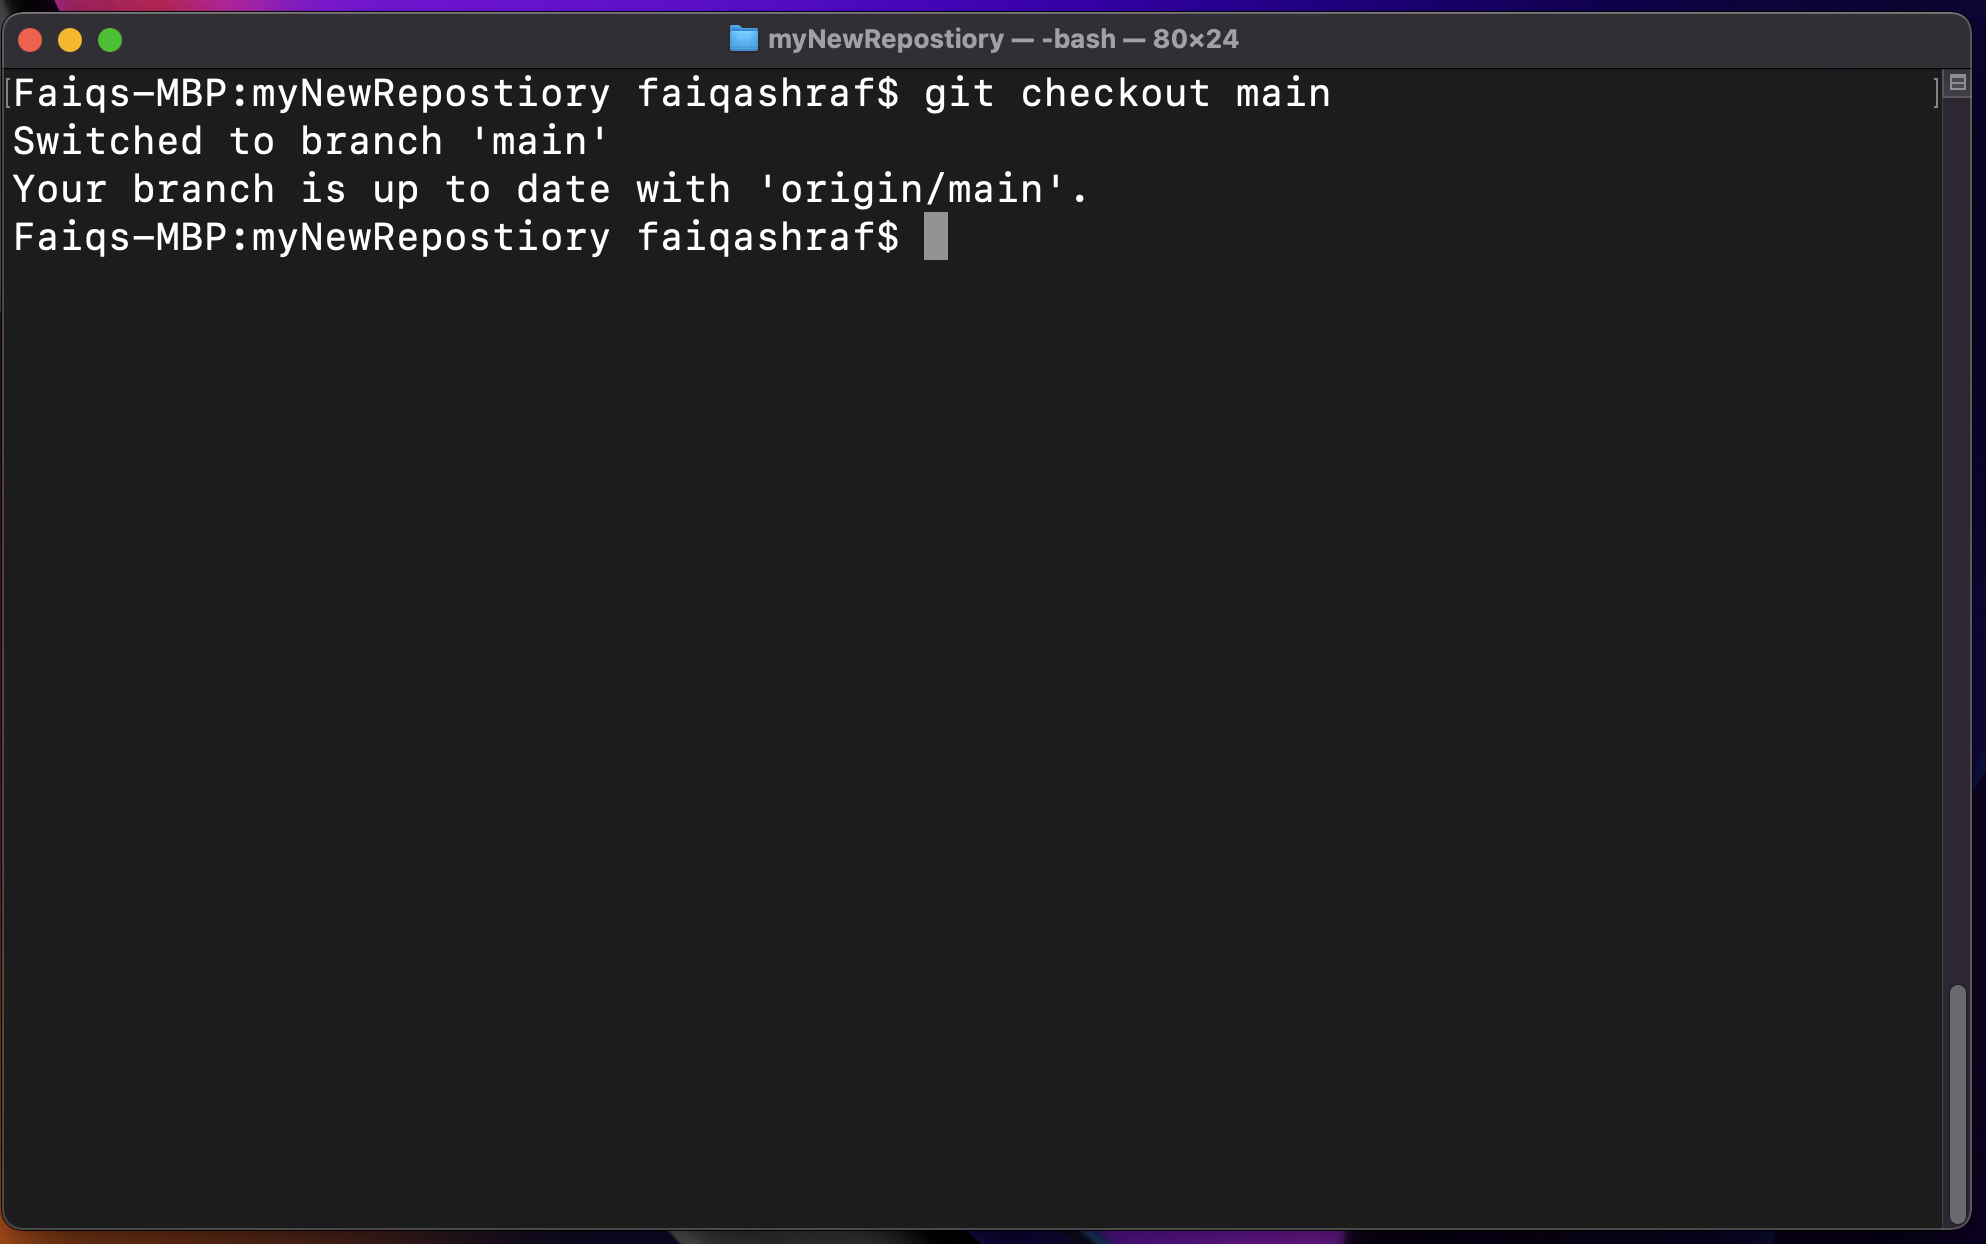 Figure 4M: We have left our new branch to get ready to merge.
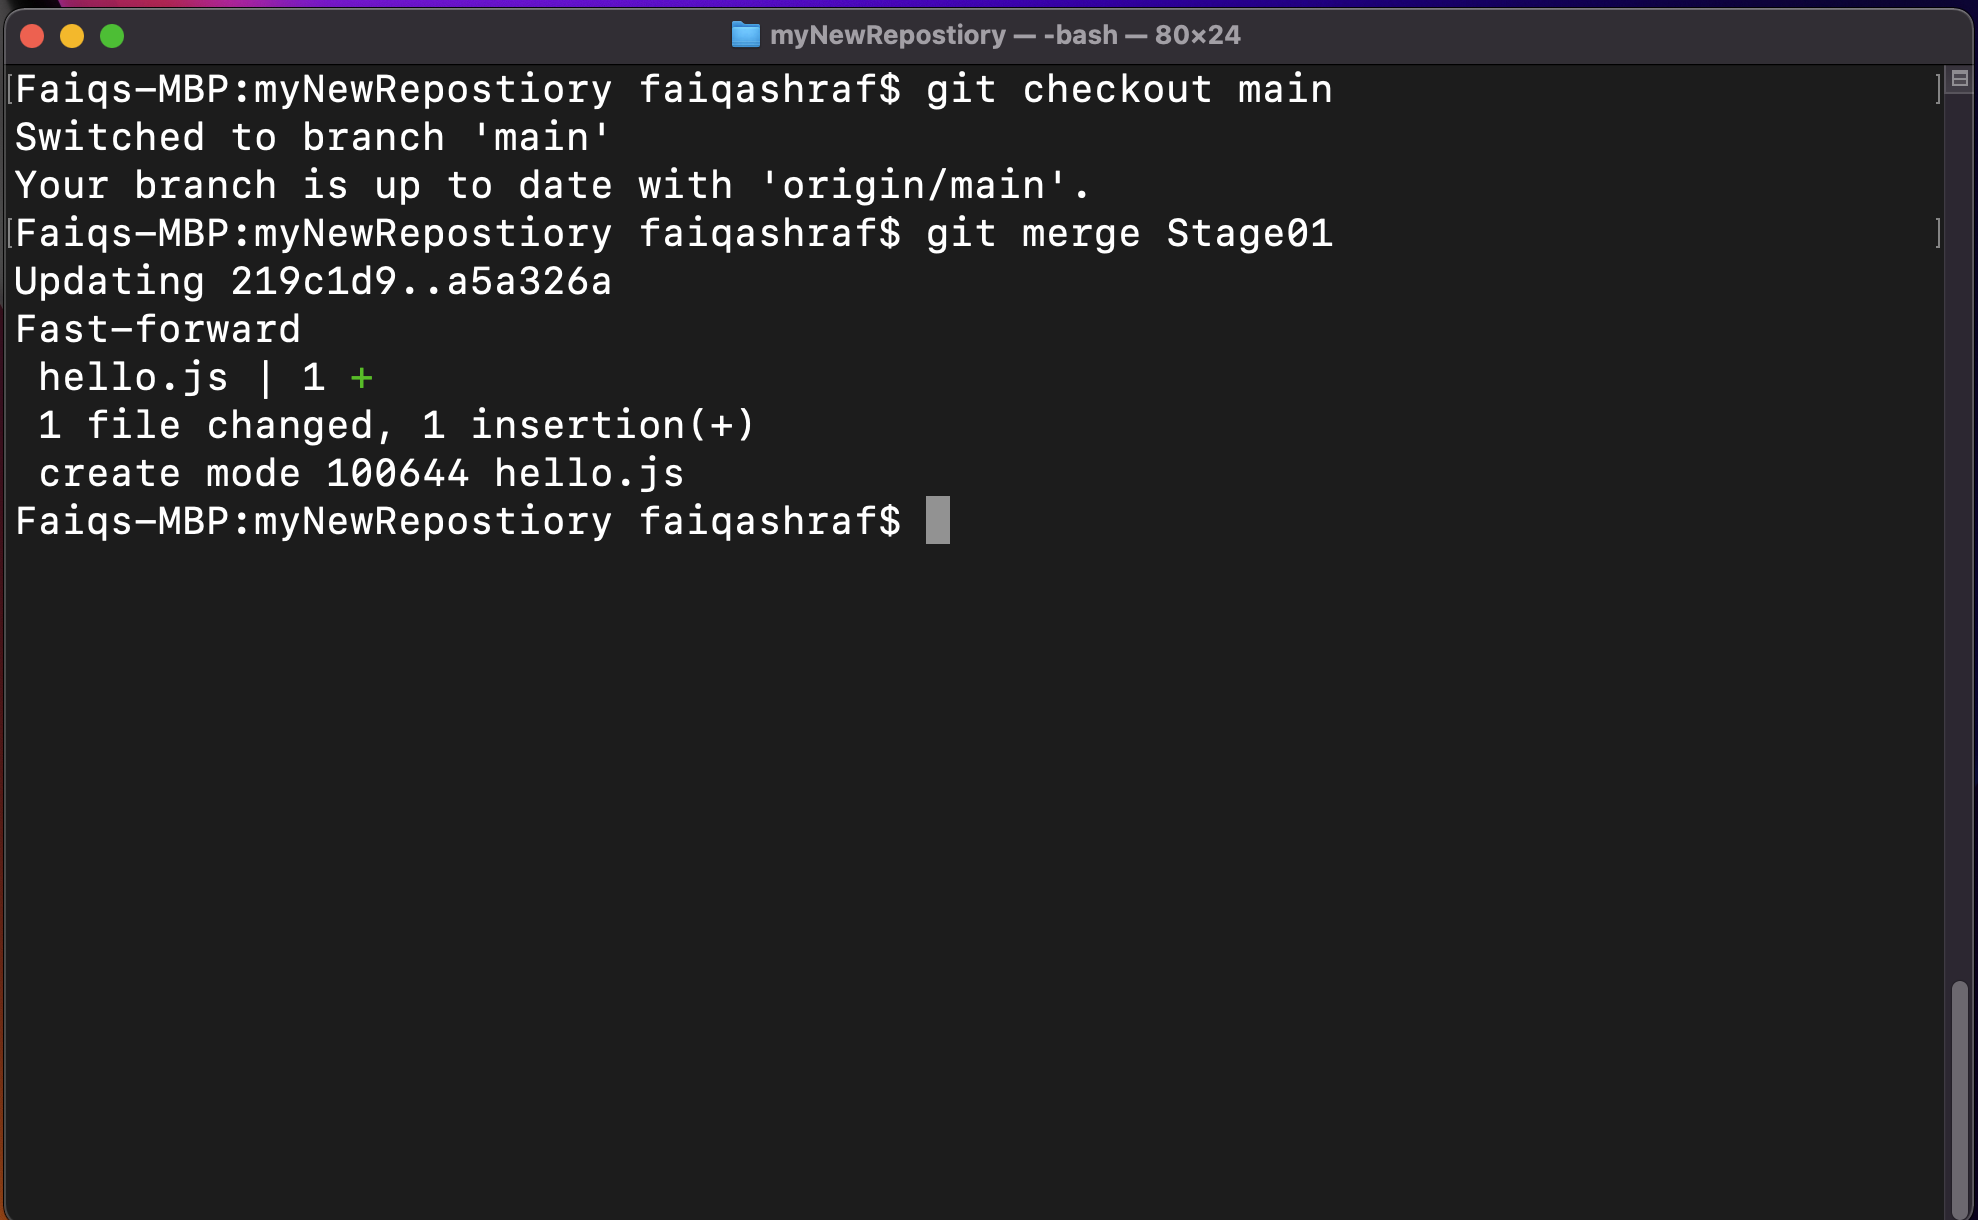 Figure 4N: You should see something similar once you run the merge command.
Some things to note about branching
- Branching will merge all commits made in an individual branch with those of the parent branch.
- All files and folders are transferred over and overrides anything already in the new branch.
- The Branches, themselves, aren't deleted when merged. To delete them you can type git branch -d \branchName\.
So there you have it. Branching isn't all that bad. Hopefully you better understand the way Branching works. I sure do. Let's recap what we learned on the next page.